Checking and updating your system BIOS helps to improve your PC’s performance. It is informed you that this BIOS is eligible to remove some of the bugs and harmful glitches. It’s the abbreviation of Basic Input/Output System. Whenever you tap the Start tab, your system uses the particular BIOS firmware to start your device.
BIOS helps you to keep your system from further crashing and freezing which results in your data loss. It’s a low-level program. Here we are going to tell you how to inspect your BIOS on your device and its functioning:
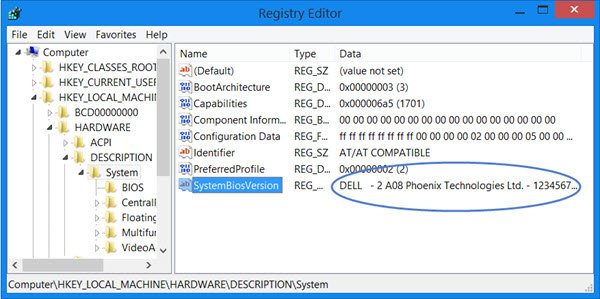
Checking System Related BIOS Edition
One can know the version of their BIOS through Settings. The edition of BIOS will be displayed in the BIOS menu. It is interesting that you don’t require reboot operation for viewing BIOS edition. There are two ways to check your BIOS Edition:
Using Command Prompt
First of all, hit the “Start” tab and then enter “Command Prompt” in the provided space.
Now, hit the resulting option.
Note: Don’t run the program with Administrator privileges.
After that, enter the following command in the Command window:
“wmic_bios_get_smbiosbiosversion”
Now, hit the resulting option.
Note: Don’t run the program with Administrator privileges.
After that, enter the following command in the Command window:
“wmic_bios_get_smbiosbiosversion”
Now, tap the “Enter” key.
Next, you will be able to view your BIOS edition number to which your device relates.
Using “System Information Window”
Next, you will be able to view your BIOS edition number to which your device relates.
Using “System Information Window”
This is another method to locate the BIOS version of your device.
Follow these instructions to find your system’s BIOS version:
First of all, hit the Windows logo and “R” keys to launch Run dialogue box.
After that, enter “msinfo32” in the Run dialogue box followed by “Enter” key.
Go to the section “System Summary” and then check your BIOS version.
Now, check the date and BIOS edition of your system.
Updating BIOS
After that, enter “msinfo32” in the Run dialogue box followed by “Enter” key.
Go to the section “System Summary” and then check your BIOS version.
Now, check the date and BIOS edition of your system.
Updating BIOS
BIOS is situated on a particular chip located on your device’s motherboard. The latest devices (PC) uses UEFI firmware works similarly instead of BIOS. However, BIOS updates don’t provide major updates related to your device. Check your PC properly, and if it is working fine, then you need not upgrade BIOS to the next step. If you update your BIOS unnecessarily, then you might face some bugs that can restrict your task. In case, you encounter the issue that your device loses power while flashing BIOS; you might get into trouble. It might restrict you from starting your device.
On the other hand, in case you wish to update your system’s CPU, then you can update BIOS. But normally it is not recommended to do the same. If you want to update BIOS for just hardware support, then you can take this support by the product manufacturing company.
In case, you are performing an update to your system’s BIOS; then you can face some hindrances and bugs. In this case, it is recommended to take technical support for its solution. You can check BIOS version on your device any time, but if you are experiencing bugs and other harmful viruses, then it’s not the fault of BIOS. It’s the cause of your Windows Update. Check your updates properly and if got any issue, then remove it from your device. It is not always necessary and recommended to update BIOS.
Hey I am David root, a certified technical professional for ESET with over five years of experience. If you face any issue regarding your eset.com/activate then can help in all sorts of problem and get instant solution from ESET Experts in a small time period.
Comments
Post a Comment